“Amateurs study strategy, professionals study logistics.” – Omar Bradley
I get a lot of questions about how this entire thru-hiking thing works and what have I done to prepare for it.
As for how I have physically prepared, I have been trying to hike two to four times a week, moderate to difficult terrain, 10+ miles each hike and carrying my full pack for the last twelve months. I have taken a week off here and there, but have stuck with this schedule fairly religiously. Overall, I feel like I am in pretty good shape to start this thru-hike.
I also did three two-night backpacking trips on the AT and a week-long trip on the AT in the summer and fall of 2023. Due to the time of year that I was hiking in the mid-Atlantic (Front Royal VA to Duncannon PA) I was very much alone on the trail and in camp most nights. This let me get comfortable with my gear, the physical aspects of backpacking and camping, and most importantly the mental aspects. It is that mental aspect of a solo thru-hike that worries me the more than anything else.
Some statistics about hiking the trail.
Before I get into how this whole “how does this thru-hiking thing work”, a little bit of statistics.
Approximately three million people visit the Trail every year. Approximately 4,000 people attempt a thru-hike of the entire AT each year. Historically about 25% of those who attempt to thru-hike the AT are successful. In fact, the completion rate appears to be dropping. Since 2016, only about one in five have finished the whole trail. Of those hikers that do drop-out for any number of reasons, 60% of them drop-out before they reach Damascus, Virginia (NOBO mile 471). There is anecdotal evidence that a significant amount of the drop-outs occur within the first 100 miles or roughly 10 days.
Here is a great little article on why 75% of AT thru-hikers won’t make it.
The largest age group of thru-hikers by far are under 30, but there is a significant amount of people in their late 50s and early 60s.
Here is a nice easy read on a lot of interesting AT thru-hiker statistics for 2023.
Gear Overview
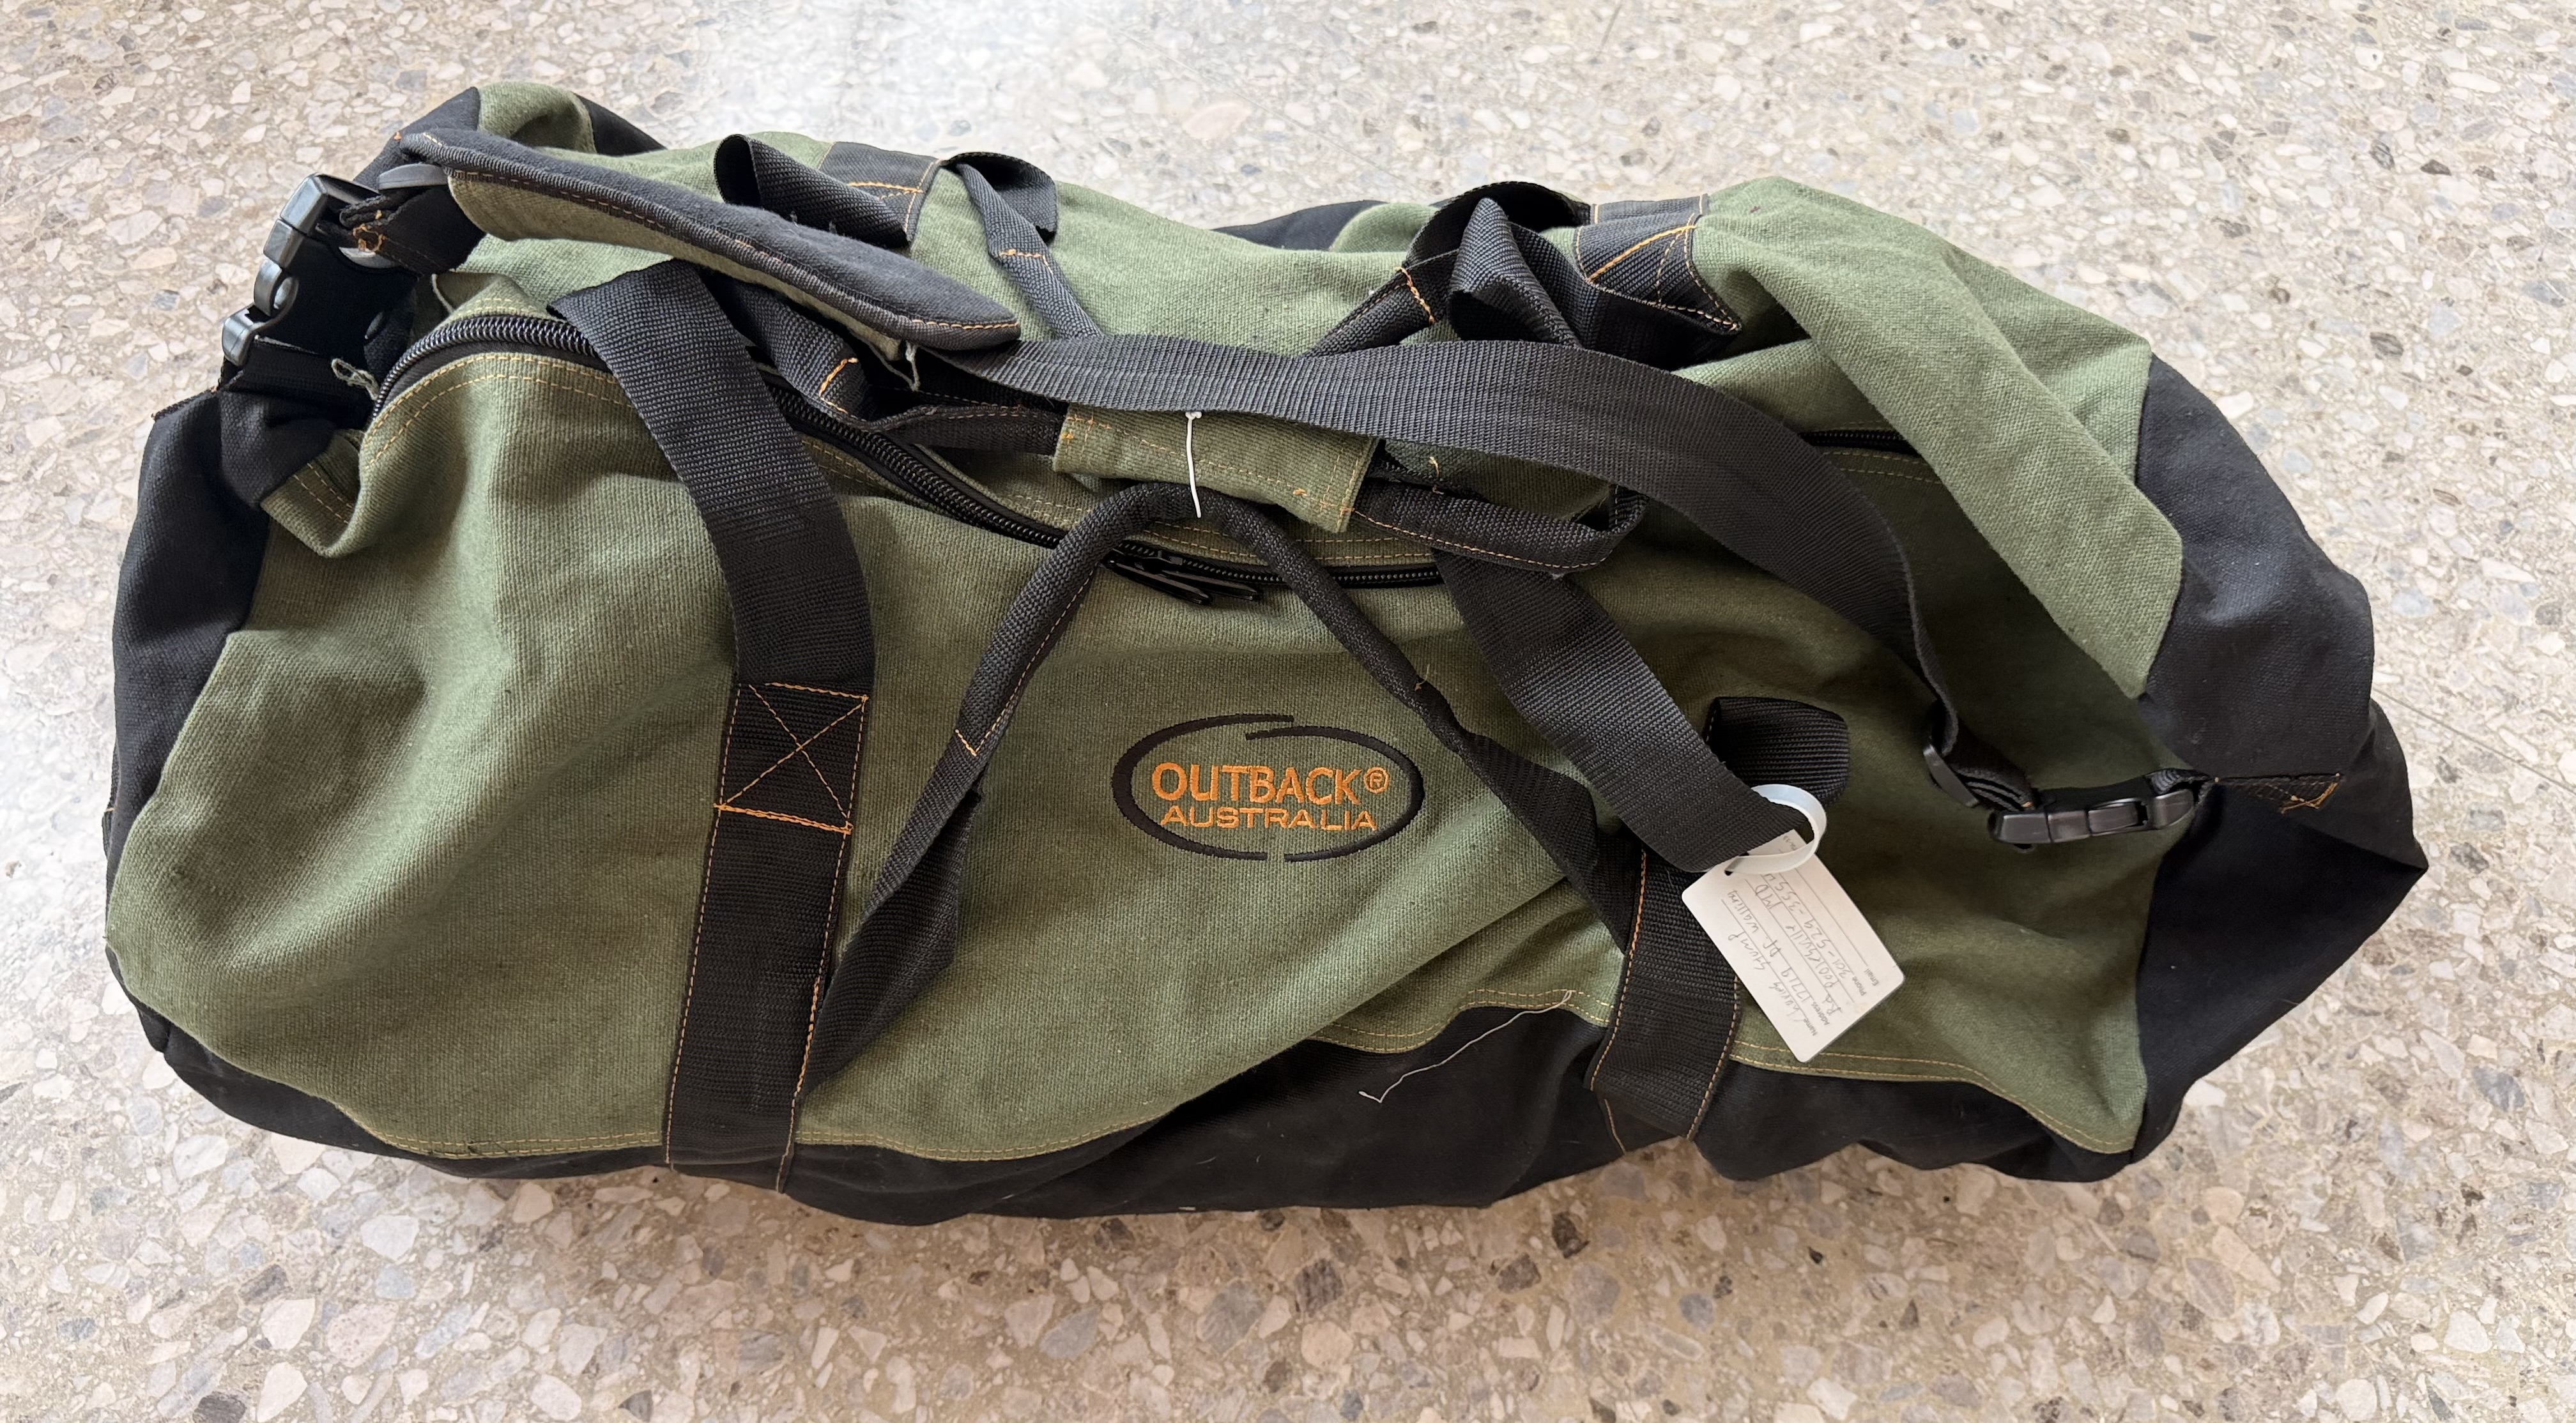
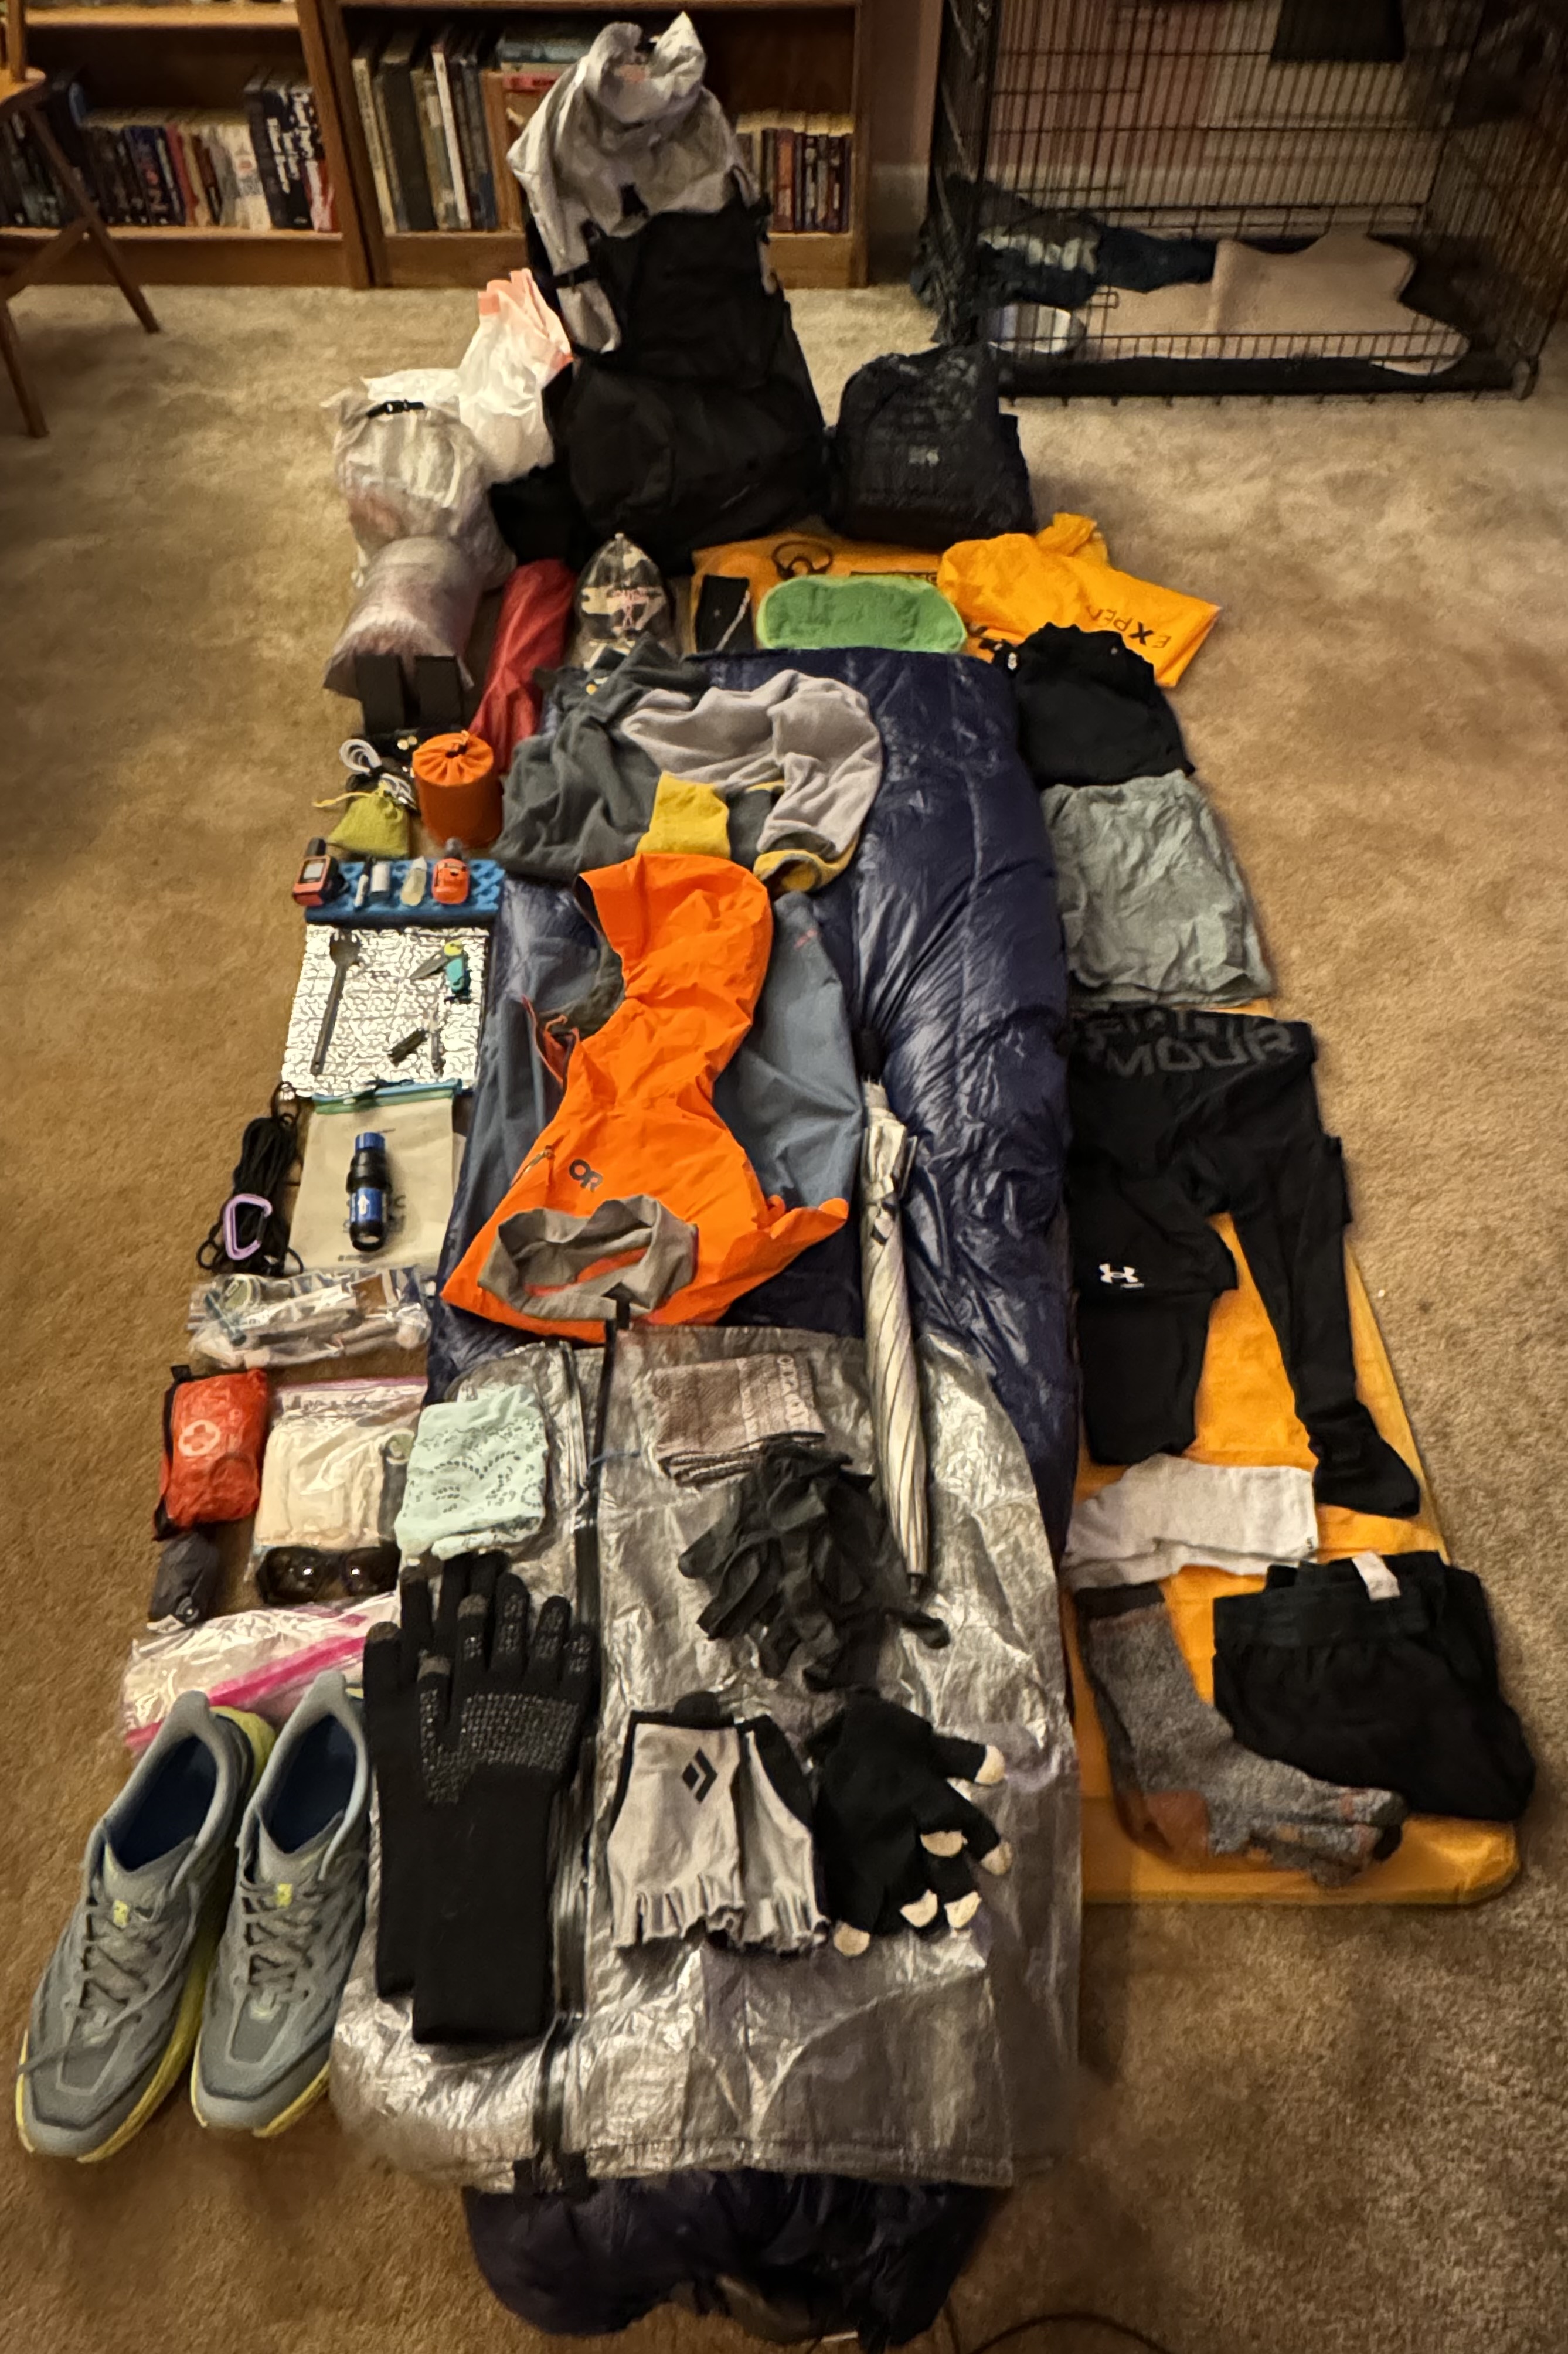
Everything that I need for 5-6 months on the trail, not counting consumables, will be carried on my back. That means I need to be very careful in choosing what to take with me, what not to take with me, and how to plan and manage my gear and consumables (food, water, fuel, meds, toiletries, etc.). I have a complete gear listing on a later blog page, but I am including some major highlights here based on questions that I am frequently asked.
Shelter – MSR Hubba Hubba 2 two person free-standing tent that weighs 2.8 pounds. Very roomy and very dry. Been using this for the past year.
Sleep System – Nemo Tensor Insulated inflatable sleep pad at 19 ounces, Enlightened Equipment Revelation down quilts at 30 ounces for winter and 22 ounces for summer, Sea to Summit Aeros inflatable pillow at 2.6 ounces. I sleep on my side and generally prefer a quilt to a traditional heavy sleeping bag. I have one for clod weather and a different one for warm weather. Will swap as needed. Been using this setup for the past year.
Backpack – ULA Circuit Ultra 68 liter pack with waist belt pouches and chest strap pouches at 2 pounds 3 ounces. This is an internal frame pack with a fairly sturdy waist belt. I carry a .75 liter water bottle on my right chest strap and my iphone and sunglasses on my left chest strap. Snacks in one hip pouch and frequently used items like bug spray and bandanna in other hip pouch. Just switched to this heavier backpack in January.
Kitchen – 650ml titanium pot with lid, a long handled spoon, MSR Pocket Rocket stove, isobutane fuel canister, misc items all at a pound.
Clothes – one long sleeved shirt, one short sleeve shirt, one pair of long thermal underwear, one pair of shorts for sleeping, one pair of convertible pants (turn into shorts), three pairs of socks (one just for sleeping), one spare pair of underwear, light-weight fleece pull over.
Rain gear – umbrella, rain kilt, heavy rain jacket, two pairs of 8 mil Nitrile gloves.
Electronics – iphone, Garmin InReach Mini satellite/GPS communicator, two 10,000ma power banks, headlamp, iPad mini. Originally I had just planned on taking a Kindle at 7 ounces, but Dana had a spare iPad mini at 11 ounces which will make blogging much easier and I can read books on it. Decent trade off for the extra 4 ounces. The two power banks can recharge my iphone from 0% to 100% a little over two times each. I go through about 50% of iphone battery daily while on trail due to audio books or music.
Note on clothes and hygiene….basically I have one set of clothes to hike in and one set to sleep in. I hope to be able to get a shower and do laundry about once a week or so.
Why is weight so important on the trail?
I cannot stress enough how important managing weight is on a long hike. By weight I am refereeing to how much weight you are carrying, not how much you weight. There is a direct correlation between people who carry less weight on the trail and successfully completing a thru-hike. People who carry less weight have a much higher success rate than people who carry more weight.
“Base weight” is the weight of all of your gear minus consumables like food, water, and fuel. You’re generally considered an ultralight backpacker if your base weight is under 10 pounds and a lightweight backpacker if your base weight is under 20 pounds. Most traditional backpackers will have a base weight under 30 pounds.
“Total Weight” is your base weight (all your gear including your cell phone) plus the weight of all your food , water, and fuel (i.e. your consumables).
Water is heavy. One liter weight 2.2 pounds. Food is also heavy. The general rule of thumb is 2 pounds of food per day. That said, there are plenty of ways to make food lighter without sacrificing calories. Think calorie dense food with zero or minimal water content that you can rehydrate at meal time. I personally find that I can get by on 1.5 pounds (24 ounces) per day with careful planning.
I spent a LOT of time researching, planning, testing, failing, re-planning, re-testing and continually paying attention to the weight that I am carrying. At 55 years old with lots of hard miles on my lower body and back, weight is everything. Also, ounces quickly add up into pounds. For example, I literally cut my tooth brush in half to save 1.5 ounces.
In my opinion, anything over 20 pounds base weight or 30 pounds total weight is asking for trouble.
My starting base weight for this AT thru-hike is 19.8 pounds which includes 1.5 pounds of cold weather gear that I will ditch after the first 30-40 days.
I carry a 1 liter water bottle and a .75 liter water bottle for 3.85 pounds of water. I prefer to only carry 2.5 days of food at any one time or about 4 pounds. There are plenty of times where I need to carry 3 days of food at about 5-5.5 pounds and a few (3 I think) where I will have to carry 4 days of food at 6.5-7.5 pounds (not looking forward to those). And lastly, I carry one small fuel canister for my stove which weighs 7.5 ounces when full.
That makes my total weight for a 2.5 day section of trail roughly 28.5 pounds or 27 pounds once I ditch my cold weather gear. That assumes that all my gear is dry and I am not dragging around couple of pounds of water logged tent and clothes!
I am not in love with my base weight, but I can live with it. I was down to about 16 pounds last fall, which I thought was great. But that was using some ultralight gear that my older body just was not happy with (not enough support and some other physical problems). Fortunately I hiked A LOT with that gear and learned that sometimes physical comfort/necessity outweighs weight 🙂
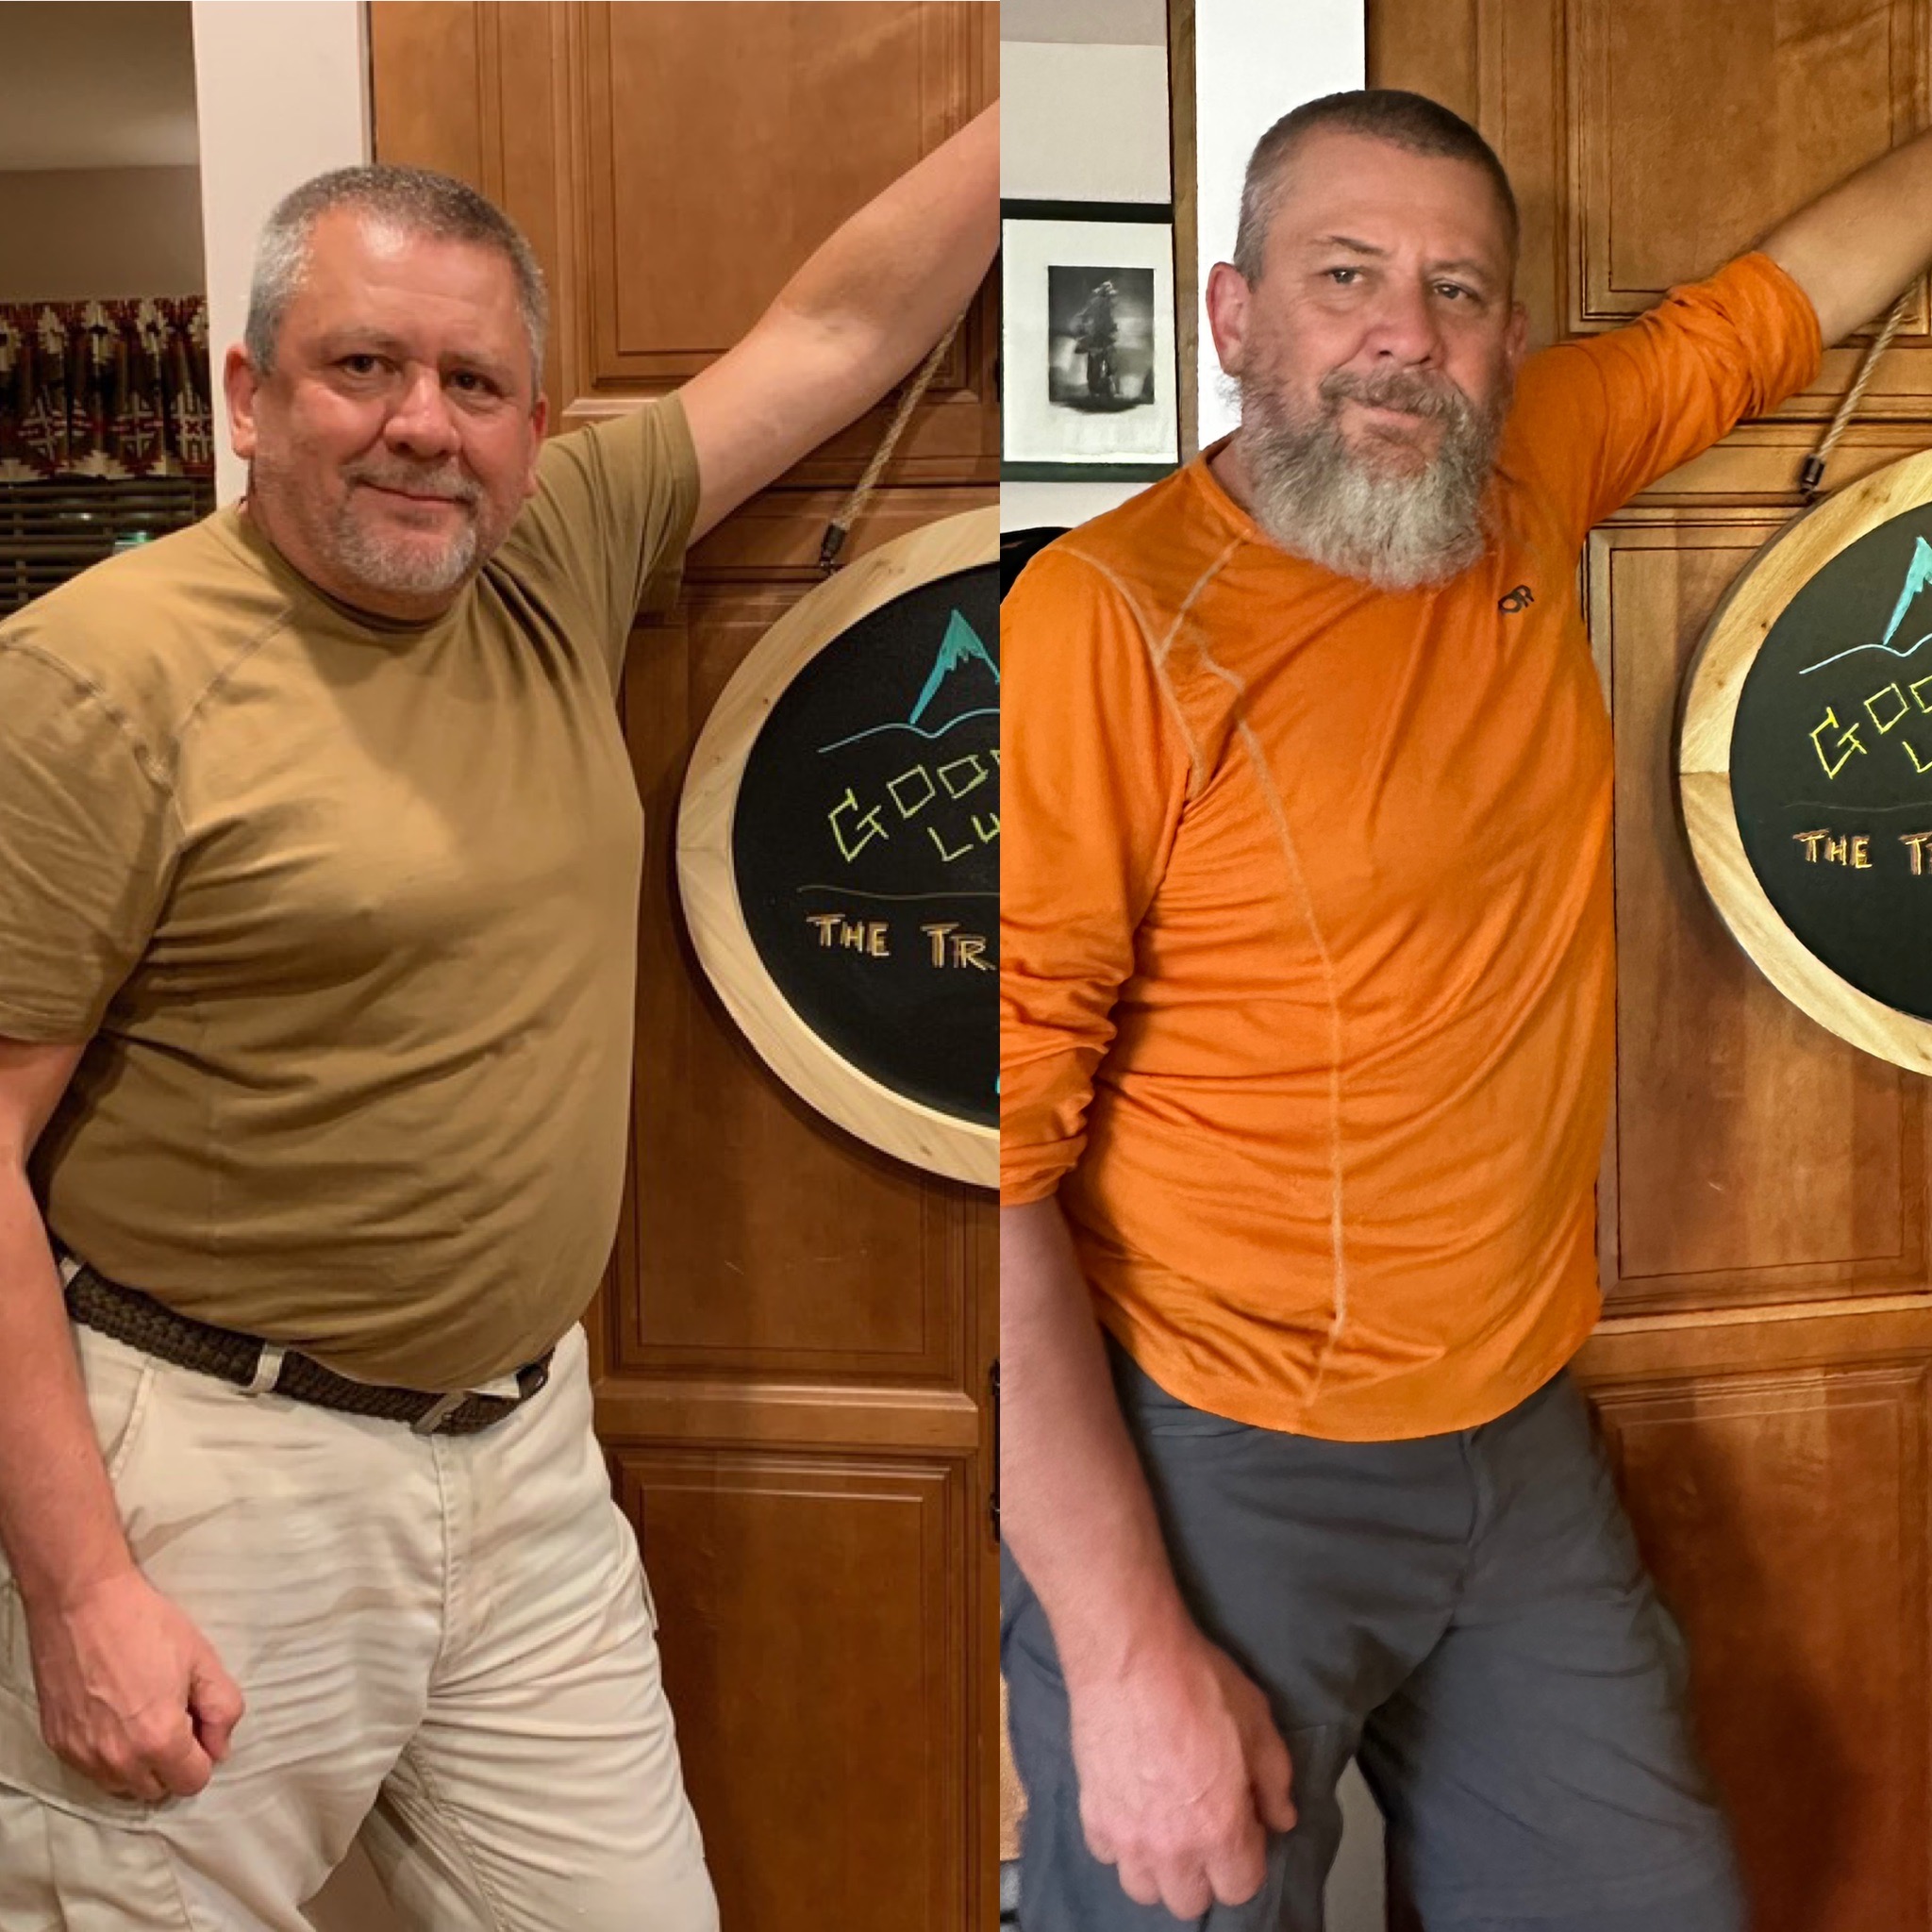
One caveat on that body weight topic. All weight has an impact on your feet and legs, including the body weight you are carrying. I worked hard to drop 20 pounds of body weight before my AT thru-hike because it is hard to drag that extra weight up and down steep mountains for days on end.
Where to spend the night on the trail?
There are shelters along most parts of the trail spaced roughly 7 to 12 miles apart. Shelters are three-sided structures that provide basic protection from the elements. One side is left open to the elements and you set up your sleeping kit on a wood floor. They range from small and basic with room for 4 people to sleep to large and fancy with porches, picnic tables, fire pits, swings and room for up to 16 people. There are locations to set up your tent at/around the shelters ranging from a few tent sites to 40+ tent sites. Many shelters (most?) have a privy (crude semi-outdoor toilet facilities) as well as some mechanism to keep your food away from bears and other animals (bear boxes, bear poles, bear cables).
In addition to shelters, there are sometimes official camp sites that have specific locations for setting up a tent. These may have a privy and food storage mechanisms. There are lots of unofficial camping locations with room for anywhere from 2 to 8 tents but no other facilities. Camping at one of the unofficial camping spots is known as “stealth camping” or “dispersed camping”.
There are a lot of hostels along the trail, particularly in the south and again in New England. Hostels range from first-come-first serve bunk rooms that can sleep anywhere from 4 to 20 people, to rentable rooms with 1 or 2 beds, to small rentable cabins with a heating source. They range from very basic to almost luxurious. Hostels generally have some kind of common/social room for the hikers to congregate and socialize as well as a self-service kitchen for preparing your meals. A night at a hostel can range from $25 up to $100 depending your sleeping preference. Most hostels offer showers, laundry, loaner clothes, snacks, and basic food resupply (ramen, Knorr rice dishes, jerky, tuna packets, snack food, etc) for an additional fee.
Lastly, there are the traditional motels/hotels available in towns directly on the trail or within a short hitchhike or shuttle ride to town. Think Motel 6 or even non-chain mom-and-pop roadside motels. Those run anywhere from $75 to $125 a night.
The FarOut app is the most common tool used by hikers to navigate the trail and to find details on shelters, camp sites, hostels, towns/hotels, drinking water, food resupply, and much more. This is a mobile app for your phone or other computer device and includes comments from hikers (online version of word of mouth). This app is your most accurate and current source of info on the trail.
In general, my plan is to find a hostel or motel every third or fourth night and sleep in my tent all other times. I will avoid sleeping in shelters, particularly in GA, NC, and TN due to the Norovirus problems on trail in those states.
Where to go to the bathroom on the trail?
Most shelters have a basic privy. These are intended for pooping and NOT for peeing. Go find a tree or a bush to hide behind to pee. Bring your own toilet paper.
The problem with privies, particularly in highly traveled areas and all of the trails in GA and NC in the spring, is that they can fill up, they can smell, people can be inconsiderate slobs, and they can be the perfect place to pick up Norovirus. More on that last item later.
Other than privies, what options does that leave? Dig a 6-8 inch deep hole well away from the trail or water sources, and do your business there. Then cover it back up with dirt. Welcome to the great outdoors and Leave No Trace principles!
Side note – anything you pack in you need to pack out. Except for some rare exceptions at large parking lots on trail or state parks, there are NO TRASH CANS.
Where to get water on the trail?
In most areas there are plenty of water sources on the trail. The most common are streams, springs, creeks, rainfall runoff, stagnant pool of water under a bridge. When getting water from these sources you should filter or chemically treat the water. Sometimes if the water is nasty enough (think fecal contamination form livestock), you might want to both filter and treat the water.
The trick with natural water supplies like this is that they can be very seasonal and unpredictable. You need to research water availability constantly and plan ahead. Word of mouth about water sources is the best way to know about water availability on trail. Hiker notes/comments about good or bad water sources in the FarOut app.
If the trail runs through a state park there will typically be well water of some sort.
Roadside gas stations, convience stores, and restaurants are also common locations to get water. Just refill your water bottle from the sink in their bathroom.
A few important notes about water:
- Water is the heavy. One liter is 2.2 pounds.
- Water availability varies by season. There are lots of good water sources in spring and early summer. But those same sources can be bone dry in the summer and fall.
- The goal is to strike a balance between 1) how much water to carry versus 2) availability of water on trail versus 3) how hot it is and how much you need to drink.
Where to get food/supplies on the trail?
There are two basic ways to resupply yourself on the trail. One way is to package up your supplies ahead of time at home into resupply boxes and mail them to yourself on the trail. The other is to buy what you can where you can at things like gas stations, convenience stores, Dollar Generals, hostel, outfitters, etc.
I prefer to resupply on trail, but there are some locations where it is just easier to ship things to myself than to get a shuttle and go into town and find a store and then get right back on trail. Therefore, I am doing a mixture of both methods. I put together resupply boxes that I will ship via USPS to various hostels as well as a US Post Office or two. These mainly contain food items other things that I will have trouble finding on a particular part of the trail. Also they contain my meds as I don’t want to carry 170 days worth of meds with me.
My goal is to carry the least amount of food as possible to minimize weight. I also don’t like getting off trail and dealing with hitching or shuttling miles into town to resupply. There are sections of trail where I know I can resupply from a hostel or some store that is less than a mile off trail almost every day or every other day. This is my perfect world.
However there are some hostels and towns that don’t have good resupply options and some sections where there are no resupply options. In those cases I will use resupply boxes. For example, when I hike through the Great Smoky Mountain National Park I do not want to carry all the food that I need for 7-8 days! The other resupply option is to get off trail on day 4, get a shuttle and drive 30 minutes into Gatlinburg TN, buy supplies, get a shuttle back to the trail. I want to push all the way through the Smoky Mountains and not get off trail. To solve that, I shipped a resupply box to a shuttle driver who will deliver it to me at Newfound Gap on day 4.
I am very fortunate that I have a great support network at home. I made up resupply boxes for the first half of the trail and Dana will tweak their contents as needed and ship them to me at pre-arranged locations as I progress up the trail.